
The convenience and utility of RV toilets cannot be overstated. The most frequently asked RV toilets replacement questions are answered here.
Can You Upgrade an RV Toilet?
If the toilet in your RV is too tiny or doesn’t function as smoothly as you’d like, you can get an update. There are a variety of toilet types available in a variety of sizes and styles to meet your needs. After installing an RV converter, you’ll have greater control over the amount of water used each flush and greater water pressure, allowing you to do these tasks much more quickly.
When Should I Replace an RV Toilet Instead of Repairing It?
There are a few cases where it might be more cost-effective to get a new RV toilet than to attempt repairs. A few examples are leaky flange fittings, broken toilet bowls, and large bases. If this is the case, replacing the device is preferable to fixing it.
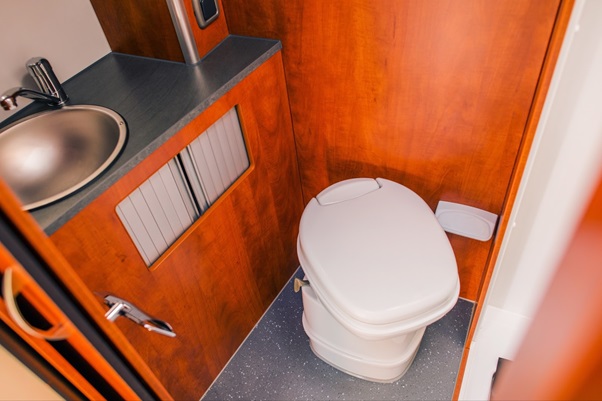
How Do You Replace an RV Toilet?
Before doing anything further, you should disconnect the RV from outside water sources and turn off the water pump. Drain the water from the current toilet into a pail and flush. First, you need to unbolt the toilet from the floor. Reconnect the water supply and ensure the new toilet is securely fastened. Always replace the floor flange seal when installing a new toilet. The bolts on the old toilet may not fit the new one, and vice versa. In such instances, use the new bolts that came with the new toilet to replace the old ones.
Once you’ve decided on a certain toilet, it’s time to take measurements of the room’s current facilities. You should also measure the area surrounding the current bathroom sink. It’s not ideal if your new toilet makes it difficult to access storage cupboards. Take measurements of the space left behind the old toilet before you start tearing it out. The RV must be placed on a flat area before removing the existing toilet. Clean the floor thoroughly once the old toilet has been removed. Also, ensure there is nothing stuck in the floor flange. The instructions for setting up your new toilet will be included in the packaging. No special equipment is required to replace a toilet with another of the same model. Reconnect the water supply line, secure the toilet, and replace any necessary covers as directed.
Do I Need Some Additional Instruments for Replacing an RV?
Installing a new toilet will be easier with the included instructions. In most cases, you need only the tools you use to remove the old toilet to install the new one.
Can I Replace My RV Toilet With a House Toilet?
It’s not the same, and you can’t use one in place of the other. Modern home plumbing includes fixtures like toilets plumbed into the main water supply and drain system. Toilet waste from a recreational vehicle goes straight into the black water tank until it is emptied. RV toilets are built to withstand the vibrations and movement of the road. They must be resilient under varying water pressure and temperatures. None of these activities should be performed in a standard home toilet. It is not portable and won’t hold up to the same level of use as a standard RV toilet. However, many RV toilets are designed to appear and feel much like ordinary toilets.
How Much Does It Cost to Replace a Toilet in an RV?
Depending on the make and type of your recreational vehicle, the price of a new toilet might range from $150 to $500. Most RV toilets are plastic, but the best models feature a residential-sized seat and employ jets to flush waste while conserving water. In most cases, the most cost-effective RV sanitation options are portable or composting toilets.
What RV Toilet Size Can I Install in My RV?
RV bathrooms range in size depending on the manufacturer and model. The standard dimension, however, is 14.5 inches in width and 19.75 inches in height. Additionally, the size of the toilet opening can be anywhere from one inch to three inches. As a result, the maximum user weight for these commodes is between 300 and 400 pounds.
RVs often have a toilet already built, but if you ever need to repair one or add another one, you may choose from a wide variety of sizes on the market. The standard RV toilet may hold anywhere from 12 to 16 gallons of water and is 14.75 inches wide and 19.25 inches tall.
Can You Put a Bidet on an RV Toilet?
You may clean yourself off using a bidet (a little sink) after you use the restroom. This is a great solution if your RV doesn’t have one or the water pressure isn’t strong enough to flush effectively every time.
In terms of installation, a bidet can be fitted to any RV toilet, no matter the size, with the right plumbing changes. A T-adapter for the waterline and some additional pipe will be required, but other than that, the installation will go normally.
Which Kind of RV Toilet Can I Replace Mine With?
There is also the common gravity-based alternative. It’s the most typical because it looks and functions just like a regular toilet. However, it does not have a water storage tank and instead uses a foot pedal to flush.
Macerating flush toilets work by crushing waste into little bits before it enters the black water tank. Keeping the sensors clear of buildup is a priority. Composting toilets recycle waste by separating the solids from the liquids, so they never run out of water. However, they require regular emptying and are, thus, not practical for a household. Portable toilets may be placed anywhere and set up quickly, reducing the volume of untreated sewage. When space is at a premium or a bathroom isn’t available, they are a great option.
How Do You Remove an Old RV Toilet?
The first step is to empty the water from the tank, which may be done using a wet/dry vacuum or leaving the tank dry for a few days. After this, raise up one side of the bowl to dislodge the bolts securing it to the floor of your RV’s lavatory.
After removing the old toilet, you must remove any wax seal material from the entrance and clean the area thoroughly before installing the new one.
Finally, refill the water tank and reconnect the power if required, then install the replacement unit per the manual’s directions, taking care not to overtighten any screws or bolts.
Comments are closed.